Gravity Roller Conveyor Design
Designing a gravity roller conveyor involves creating a simple, efficient system that uses gravity to move items along a series of rollers, typically on a slight incline, without the need for external power. The design must ensure smooth material flow, stability, and compatibility with your specific loads and facility layout. Below is a detailed guide on the key design considerations and steps for creating an effective gravity roller conveyor.
Key Design Considerations
1. Load Specifications
- Weight: Light-duty (up to 200 lbs), medium-duty (200–1,000 lbs), or heavy-duty (1,000 lbs+).
- Size: Length, width, and height of items (e.g., 12" x 10" boxes).
- Shape: Flat-bottomed, stable items (e.g., boxes, totes) work best; irregular items may need special consideration.
- Design Tip: Items must span at least three rollers for stability.
2. Conveyor Width
- Range: Typically 12"–36" for light/medium-duty; wider (e.g., 48") for heavy-duty.
- Calculation: Widest item + margin (e.g., 12" wide box + 4" = 16" conveyor width).
- Design Tip: Wider than necessary increases cost; too narrow risks instability.
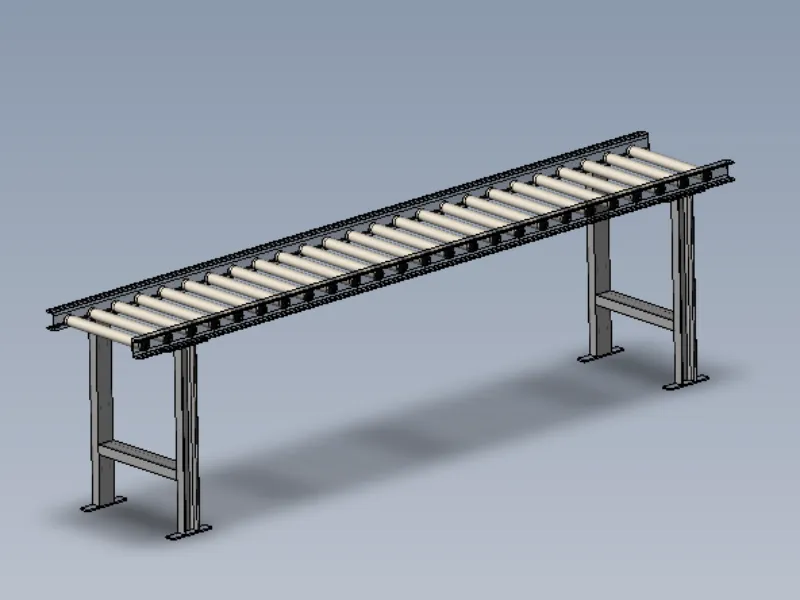
3. Conveyor Length
- Range: 5–50 feet, often in modular sections (e.g., 5' or 10' lengths).
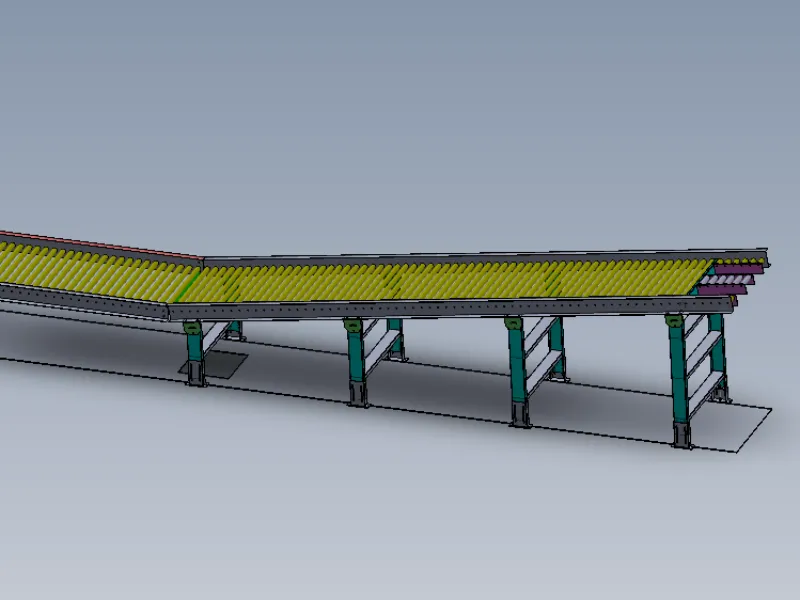
- Design Tip: Match to transport distance; longer conveyors may need supports or steeper inclines for heavier loads.
4. Roller Design
Diameter:
- 1.5"–1.9" for light-duty (easier to start moving).
- 2.5"–3.5" for medium/heavy-duty (more durable).
Material:
- Steel: Durable, cost-effective; galvanized for rust resistance.
- Plastic: Lightweight, for delicate/light loads.
- Aluminum: Balances strength and weight.
- Bearings: Non-precision (basic, low-cost) or precision (smooth, for heavier loads).
5. Roller Spacing
- Rule: Minimum three rollers under the item (e.g., 12" long item = 4" spacing or less).
- Range: 2"–6" centers; closer for small/light loads, wider for large/stable loads.
- Design Tip: Too close increases cost; too far risks sagging or tipping.
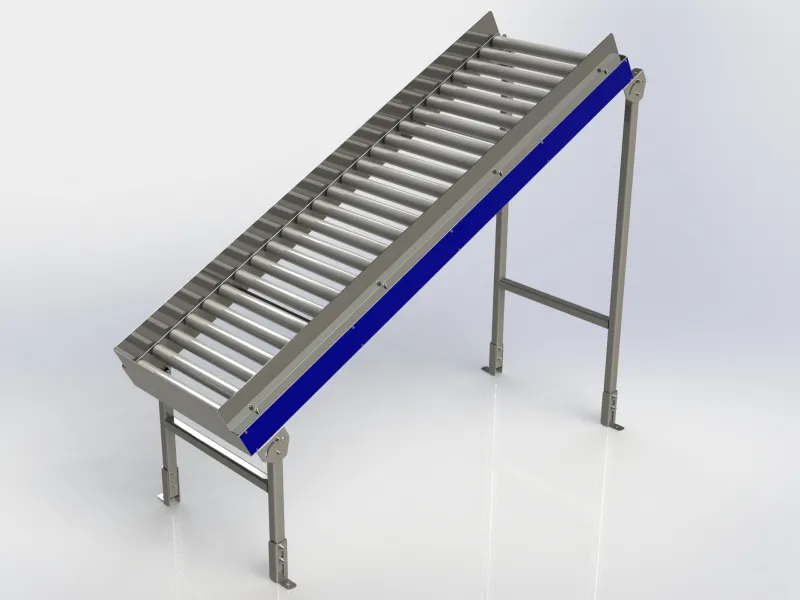
6. Incline Angle
Range:
1–5° (e.g., 1° = ~2" drop over 10'; 5° = ~10" drop).
Factors:
- Light loads (e.g., 5 lbs): 3–5° for momentum.
- Heavy loads (e.g., 50 lbs+): 1–2° to control speed.
- Design Tip: Test to balance flow—too steep causes runaway, too flat stalls movement.
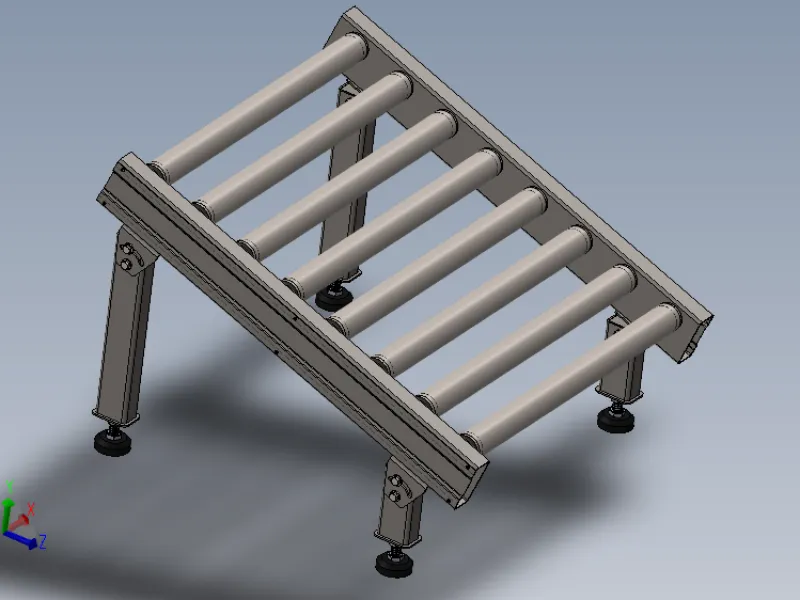
7. Frame Design
- Material: Steel for durability; aluminum for lightweight portability; stainless steel for washdown.
- Structure: Two side rails with cross-bracing to support rollers and load.
- Height: 24"–36" (adjustable legs recommended for incline and alignment).
- Design Tip: Reinforce for heavier loads or longer spans.
8. Load Dynamics
- Speed Control: Incline dictates speed; optional brakes or dampers slow heavier loads.
- Flow: Ensure items move without jamming; wider spacing or guides prevent collisions.
- Manual Push Option: Flat designs need light loads (<50 lbs) and short runs (<10 feet).
9. Safety and Support Features
- Side Guides/Rails: Prevent items from falling (e.g., 2"–4" high).
- End Stops: Stop items at the lower end.
- Supports: Legs or stands every 5–10 feet, depending on length and load.
10. Capacity and Stability
- Load Rating: Rollers and frame must exceed max load (e.g., 100 lbs/roller for 300-lb pallet).
- Design Tip: Check bearing and frame specs; test stability with your items.
Design Steps
1. Analyze Requirements
- Define load (e.g., 20-lb boxes, 12" x 10"), distance (e.g., 10 feet), and purpose (e.g., unloading).
- Measure space (e.g., 12' x 3' area).
2. Calculate Dimensions
- Width: 16" (12" box + 4" margin).
- Length: 10' straight section.
- Height Drop: 2° incline = ~4" drop over 10' (tan(2°) × 120" ≈ 4.2").
3. Select Roller Specifications
- Diameter: 1.9" for 20-lb boxes.
- Spacing: 3" centers (12" box spans 4 rollers).
- Material: Steel, non-precision bearings for cost.
4. Design Frame
- Steel, 16" wide, 30" high at start, 26" at end (4" drop).
- Adjustable legs for fine-tuning incline.
5. Set Incline
- 2° slope for 20-lb boxes (test to confirm flow; adjust to 1°–3° if needed).
- Supports every 5 feet (e.g., two stands for 10').
6. Incorporate Features
- Side guides (2" high) for alignment.
- End stop at 26" end to catch boxes.
7. Validate Load Dynamics
- Test flow with 20-lb boxes—ensure smooth descent without runaway or stalling.
- Adjust incline or add dampers if speed is excessive.
8. Finalize and Prototype
- Create a sketch or CAD (e.g., 10' x 16", 2° incline, 1.9" rollers at 3" spacing).
- Build a small section or simulate with supplier tools to verify performance.

This is a flexible gravity roller conveyor system.
Example Design
- Scenario: A warehouse needs a gravity roller conveyor to move 30-lb boxes (15" x 12") from a dock to a sorting area, 15 feet away.
- Width: 18" (15" box + 3" margin).
- Length: 15' (two 7.5' sections).
- Rollers: 1.9" steel, 3" spacing (15" box spans 5 rollers).
- Incline: 1.5° (~4.5" drop over 15'; tan(1.5°) × 180" ≈ 4.7").
- Frame: Steel, 30" start height, 25.5" end height, with supports at 0', 7.5', 15'.
- Features: 2" side rails, end stop.
- Capacity: 100 lbs/roller (300 lbs total support).
Design Tips
- Incline Testing: Start shallow (e.g., 1°) and increase—too steep risks damage, too flat stops flow.
- Modularity: Use standard sections for easy assembly or expansion.
- Load Simulation: Test with your items to confirm roller spacing and incline work.
- Supplier Tools: Leverage vendor design aids (e.g., Ashland Conveyor's configurator) for precision.
A well-designed gravity roller conveyor is simple, cost-effective, and tailored to your loads, ensuring reliable material handling. If you need help with calculations (e.g., incline drop) or a specific design scenario, let me know!
Leave Me Your Requirement!